Pickleball’s popularity is surging worldwide, and outdoor courts are at the heart of the game’s growth. Whether you’re a homeowner, community organizer, or facility manager, building a pickleball court floor can be a rewarding project. This definitive guide walks you through the process step by step.
1. Understand Pickleball Court Dimensions and Layout
Before construction, it’s essential to understand the standard court dimensions:
· Court Size: 20 feet wide by 44 feet long for both singles and doubles play.
· Clearance: Add a minimum of 10 feet on both ends and 7 feet on the sides for player movement.
· Net Placement: The net height should be 36 inches at the sidelines and 34 inches in the center.
Pro Tip: If space permits, consider building multiple courts side by side with shared sidelines to maximize the area.
2. Choose the Right Location
An ideal outdoor court location should have:
· Level Ground: A flat, stable surface minimizes grading work and ensures even gameplay.
· Good Drainage: Avoid areas prone to pooling water; proper drainage is crucial.
· Sunlight Orientation: Position the court north-south to reduce glare during play.


3. Select the Best Flooring Material
Flooring material significantly impacts gameplay and court durability. Here are top options for outdoor pickleball courts:
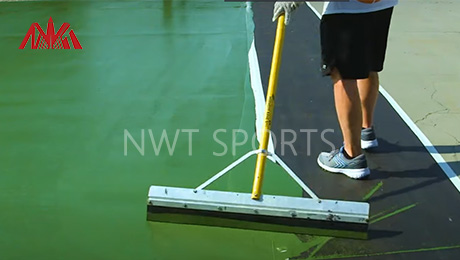
· Acrylic Coatings: A popular choice for professional courts, offering excellent traction and weather resistance.
· Concrete or Asphalt Base with Coating: Durable and cost-effective, these surfaces are finished with acrylic or textured coatings for grip and playability.
· Modular Interlocking Tiles: Quick to install, these tiles provide a shock-absorbing, weatherproof surface that’s easy to maintain.
4. Prepare the Foundation
The foundation sets the stage for a durable court:
1. Excavation: Remove debris and level the ground.
2. Base Layer: Add compacted gravel or stone for drainage and stability.
3. Surface Layer: Lay asphalt or concrete, ensuring a smooth finish.
Allow the foundation to cure fully before applying any coatings or installing tiles.
5. Install the Net System
Choose a net system designed specifically for pickleball:
· Permanent Nets: Anchored into the ground for stability and durability.
· Portable Nets: Ideal for flexible, multi-use spaces.
Ensure the net system meets regulation heights and is positioned at the court's center.
6. Mark the Court Lines
Court lines should be painted or taped with precision:
· Paint: Use high-durability outdoor paint for permanent markings.
· Tape: Temporary court tape is an excellent option for versatile spaces.
Line dimensions should follow official pickleball regulations, with clear markings for the non-volley zone (kitchen), sidelines, and baselines.
7. Add Finishing Touches
Enhance the functionality and aesthetics of your pickleball court with:
· Lighting: Install LED sports lights for evening play.
· Seating and Shade: Add benches, bleachers, or shaded areas for player and spectator comfort.
· Fencing: Enclose the court with fencing to prevent ball loss and improve safety.
8. Maintain Your Court
A well-maintained court ensures long-lasting performance:
· Cleaning: Regularly sweep or wash the surface to remove dirt and debris.
· Repairs: Promptly address cracks or damage to prevent further deterioration.
· Repainting: Reapply court lines or coatings as needed to keep the court looking fresh.
Conclusion
Building an outdoor pickleball court requires thoughtful planning, the right materials, and attention to detail. By following this guide, you’ll create a durable, professional-grade court that provides years of enjoyment for players of all levels.
For high-quality court flooring and materials, consider NWT Sports’ range of durable, low-maintenance pickleball court solutions designed for both residential and commercial spaces.
Post time: Dec-27-2024
